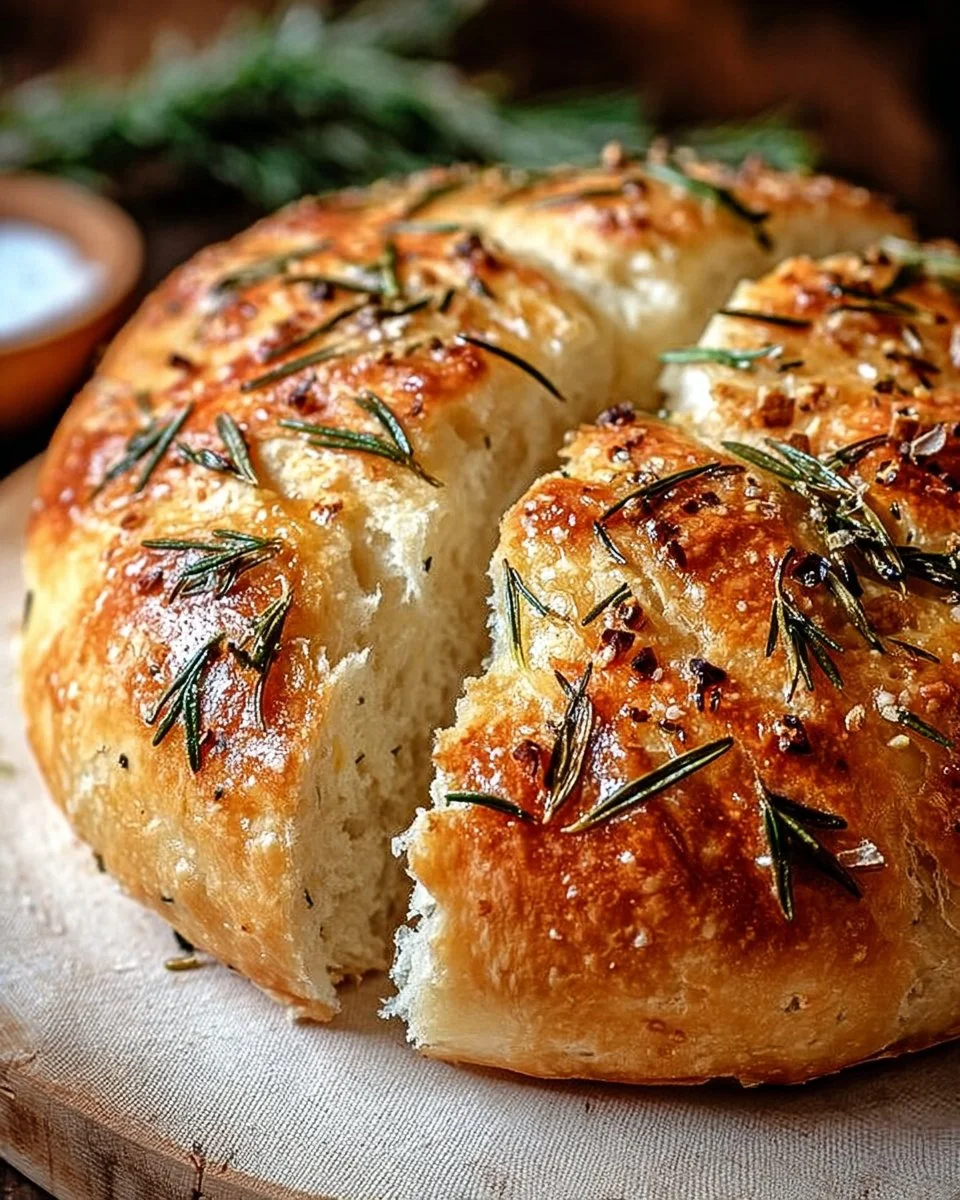
Imagine stepping into a warm kitchen, the air thick with the buttery aroma of freshly baked bread, punctuated by the earthy richness of roasted garlic and the herbal notes of rosemary. Each loaf springs forth with a rough, crusty exterior, beckoning you closer with its golden-brown hue. As you slice into it, the crust crunches gently, giving way to a soft, pillowy interior that promises satisfaction in every bite. This is not just bread; this is Easy Roasted Garlic Rosemary Artisan Bread, a homemade treasure that transforms any meal into an occasion.
As you allow the steam to envelop you, scents dance around your senses, effortlessly mingling and wrapping around you like a warm embrace. Just picture it: tearing off a chunk and spreading creamy butter that melts instantly, mingling with the roasted garlic’s natural sweetness. This loaf doesn’t just fill your stomach; it fills your home with warmth and joy, creating memories amidst the comforting ritual of bread-making.
Why You’ll Love This Easy Roasted Garlic Rosemary Artisan Bread
There’s something remarkably satisfying about creating artisan bread in the comfort of your own kitchen. This recipe stands out not only for its delectable flavor but also for its simplicity. Without the need for complex techniques or rare ingredients, this bread rises with minimal effort, producing a rustic loaf that’s perfect for any occasion.
- Incredible Flavor: The combination of roasted garlic and rosemary elevates the humble loaf, creating an inviting flavor profile that pairs beautifully with various dishes.
- Versatile: Perfect for cozy family dinners, elegant gatherings, or simply enjoying a slice with a cup of soup on a rainy day.
- Easy to Customize: Feel free to experiment with additional herbs or spices based on your preferences—thyme or sage can also bring delightful new tastes to your bread.
Preparation Phase & Tools to Use
Before diving into our artisan bread adventure, gather your tools and understand why they matter.
- Mixing Bowls: You’ll need one large bowl for mixing and another to accommodate the rising dough. A sturdy bowl ensures stable mixing, while a larger one provides ample space for your dough to grow.
- Dutch Oven: This key tool ensures even heat distribution, creating that desirable crust while locking in moisture. If you don’t have one, a heavy, oven-safe pot with a lid can be a good substitute.
- Parchment Paper: This prevents sticking and simplifies your transferring process, letting you slide your dough into the pot effortlessly.
- Kitchen Scale (optional): If you want precise measurements, a kitchen scale can help ensure your ingredient ratios are spot on.
Ingredients for Easy Roasted Garlic Rosemary Artisan Bread
- For the Bread Dough:
- 1 whole head garlic
- 1 tablespoon extra-virgin olive oil (divided)
- Coarse sea salt & freshly ground black pepper
- 1½ cups water (room temperature, ~70°F / 21°C)
- 1 teaspoon active dry yeast
- 3 cups bread or all-purpose flour (plus more for dusting)
- ½ teaspoon dried oregano
- 1 teaspoon kosher or fine sea salt
- 2 teaspoons finely chopped fresh rosemary (plus more for topping)
- 1 head roasted garlic cloves (smashed)
Each ingredient contributes a vital role in achieving that perfect loaf:
- Garlic: Roasting brings out its sweetness, providing depth to the flavor.
- Rosemary: This fragrant herb adds a wonderful aroma and taste, elevating the bread’s character.
- Flour: Bread flour, with its higher gluten content, enhances the bread’s chewiness and overall texture. You can easily substitute all-purpose flour if needed, but the chew may vary.
- Yeast: Essential for that delightful rise, using fresh yeast will yield the best results, but active dry yeast works perfectly as well.
How to Make Easy Roasted Garlic Rosemary Artisan Bread
-
Roast the Garlic: Preheat your oven to 400°F (204°C). Slice the head of garlic in half, drizzle the exposed cloves with half a tablespoon of olive oil, and sprinkle with salt and pepper. Wrap the garlic in foil and roast for about 40 minutes, or until softened. Let it cool before squeezing the cloves from their skins.
-
Mix the Dough: In a small bowl, dissolve the yeast into the room-temperature water and set it aside for 10–15 minutes until foamy. In a large bowl, combine the flour, sea salt, oregano, and chopped rosemary. Stir in the yeast mixture, smashed roasted garlic, and the remaining olive oil. Mix with a spatula until the dough is sticky and shaggy.
-
First Rise: Cover the dough with a clean towel and let it rise at room temperature for 8–10 hours, or until it doubles in size. This slow fermentation enhances the flavor and texture.
-
Shape and Cold Ferment: Gently turn the dough onto a floured surface and shape it into a ball by folding the edges toward the center. Place it seam-side up in a floured bowl or basket, cover it, and refrigerate from 1 to 24 hours (up to 48 for deeper flavor).
-
Preheat Oven & Score: Preheat your oven to 450°F (232°C) with the Dutch oven inside. Once preheated, remove the dough from the fridge. Carefully invert it onto parchment paper (seam-side down) and score the top using a sharp blade to allow for expansion during baking.
-
Bake: Using parchment paper, lift the dough into the preheated Dutch oven. Cover and bake for 30 minutes. Remove the lid and continue to bake for another 15-20 minutes until the crust turns a beautiful golden brown.
-
Cool & Slice: Once baked, remove the bread from the Dutch oven and transfer it to a wire rack. Allow it to cool for at least an hour before slicing to let the flavors settle and the steam escape.
Chef’s Notes & Helpful Tips
- Make-ahead tips: You can roast the garlic a day in advance, keeping it stored in the fridge. This can save you time on the day you plan to bake.
- Cooking alternatives: If you want to experiment, consider using an air fryer for smaller portions or a conventional oven with a baking stone.
- Customization ideas: Add a mix of chopped sun-dried tomatoes or olives for an Italian twist, or Parmesan for a cheesy flavor.
Common Mistakes to Avoid
- Using Cold Ingredients: Always use room-temperature water. Cold water can hinder yeast activation, affecting your dough’s ability to rise.
- Skipping the First Rise: This step is crucial for developing flavor. Don’t rush through it; let the dough double in size.
- Not Scoring the Dough: Skipping this step can result in uncontrolled rising, leading to misshapen loaves.
What to Serve With Easy Roasted Garlic Rosemary Artisan Bread
Enjoy this loaf in a myriad of ways, where each pairing heightens its aromatic and flavorful profile:
- Soups: A hearty minestrone or creamy tomato soup makes for a perfect pairing that soaks into the fluffy insides.
- Salads: Toss it alongside a fresh mixed green salad, accented with vinaigrette for a balanced meal.
- Dips: Serve it with a bowl of olive oil + balsamic vinegar or hummus for an indulgent appetizer.
- Cheese Board: Pair with a selection of cheeses—brie or aged cheddar complements the garlic beautifully.
- Sauces: Drench it in a rich marinara or pesto for a satisfying savory experience.
- Main Dishes: Serve alongside roasted meats or a classic Italian dish like lasagna for a comforting meal.
Storage & Reheating Instructions
To savor this artisan bread at its peak, follow these storage tips:
- Fridge: Store wrapped in foil or a bread bag for about 3 days.
- Freezer: Slice and wrap in plastic wrap or aluminum foil; freeze for up to 3 months. Thaw at room temperature before reheating.
- Reheating: For a crispy crust, reheat slices in the oven at 350°F (175°C) for 10-15 minutes.
Estimated Nutrition Information
- Serving Size: 1 slice (approximately)
- Calories: ~150
- Protein: 4g
- Fat: 2g
- Carbohydrates: 28g
- Fiber: 1g
(These values are approximate and will vary based on specific ingredient brands and portion sizes.)
FAQs
Can I use whole wheat flour instead of white flour?
Absolutely! Whole wheat flour can add a nuttier flavor and denser texture. However, you may need to adjust the water as whole wheat flour absorbs more moisture.
How can I tell if my bread is done baking?
The bread should be a deep golden color, and when you tap the bottom, it should sound hollow. An internal temperature of around 200°F (93°C) is another good indicator.
Is it necessary to let the dough rise for a long time?
Yes! A long rise allows the flavors to develop fully. If you’re pressed for time, you could do a quick rise, but the flavor may not be as rich.
What should I do if my dough doesn’t rise?
Ensure your yeast is fresh and active. If the water you used was too hot or cold, it could have killed the yeast, thus preventing rising.
Can I add other herbs or flavors?
Definitely! Feel free to be creative by incorporating others like thyme, sage, or even spices like crushed red pepper for a little heat.
Conclusion
Creating your own Easy Roasted Garlic Rosemary Artisan Bread fills your kitchen with warmth, inviting aromas, and anticipation of the deliciousness to come. Each step transforms simple ingredients into something spectacular, giving you a moment of joy with every bite. So, gather your tools, indulge your senses, and embark on this baking journey—your tastebuds will thank you! Enjoy the delectable experience of homemade artisan bread that not only nourishes the body but also warms the soul. It’s time to bake, and trust me, once you take that first bite, you’ll never look back.
Print
Easy Roasted Garlic Rosemary Artisan Bread
- Prep Time: 15 minutes
- Cook Time: 55 minutes
- Total Time: 10 hours 10 minutes
- Yield: 1 loaf 1x
- Category: Bread
- Method: Baking
- Cuisine: American
- Diet: Vegetarian
Description
A simple and flavorful artisan bread infused with roasted garlic and fresh rosemary, perfect for any meal.
Ingredients
- 1 whole head garlic
- 1 tablespoon extra-virgin olive oil (divided)
- Coarse sea salt & freshly ground black pepper
- 1½ cups water (room temperature, ~70°F / 21°C)
- 1 teaspoon active dry yeast
- 3 cups bread or all-purpose flour (plus more for dusting)
- ½ teaspoon dried oregano
- 1 teaspoon kosher or fine sea salt
- 2 teaspoons finely chopped fresh rosemary (plus more for topping)
- 1 head roasted garlic cloves (smashed)
Instructions
- Preheat your oven to 400°F (204°C). Slice the head of garlic in half, drizzle with half a tablespoon of olive oil, and sprinkle with salt and pepper. Wrap in foil and roast for about 40 minutes, or until softened. Let cool and squeeze the cloves from their skins.
- In a small bowl, dissolve the yeast into the room-temperature water and set aside for 10–15 minutes until foamy. In a large bowl, combine flour, sea salt, oregano, and chopped rosemary. Stir in the yeast mixture, smashed roasted garlic, and the remaining olive oil until the dough is sticky.
- Cover the dough with a clean towel and let it rise at room temperature for 8–10 hours, or until it doubles in size.
- Gently turn the dough onto a floured surface and shape it into a ball. Place it seam-side up in a floured bowl or basket, cover, and refrigerate for 1 to 48 hours.
- Preheat your oven to 450°F (232°C) with the Dutch oven inside. Remove the dough from the fridge, invert onto parchment paper, and score the top.
- Lift the dough into the Dutch oven using parchment paper. Cover and bake for 30 minutes. Remove the lid and bake for another 15-20 minutes until golden brown.
- Remove the bread from the oven and cool on a wire rack for at least an hour before slicing.
Notes
Experiment with additional herbs or spices like thyme or sage for different flavors. Store bread wrapped in foil or a bread bag for about 3 days.
Nutrition
- Serving Size: 1 slice
- Calories: 150
- Sugar: 0g
- Sodium: 300mg
- Fat: 2g
- Saturated Fat: 0g
- Unsaturated Fat: 2g
- Trans Fat: 0g
- Carbohydrates: 28g
- Fiber: 1g
- Protein: 4g
- Cholesterol: 0mg
")