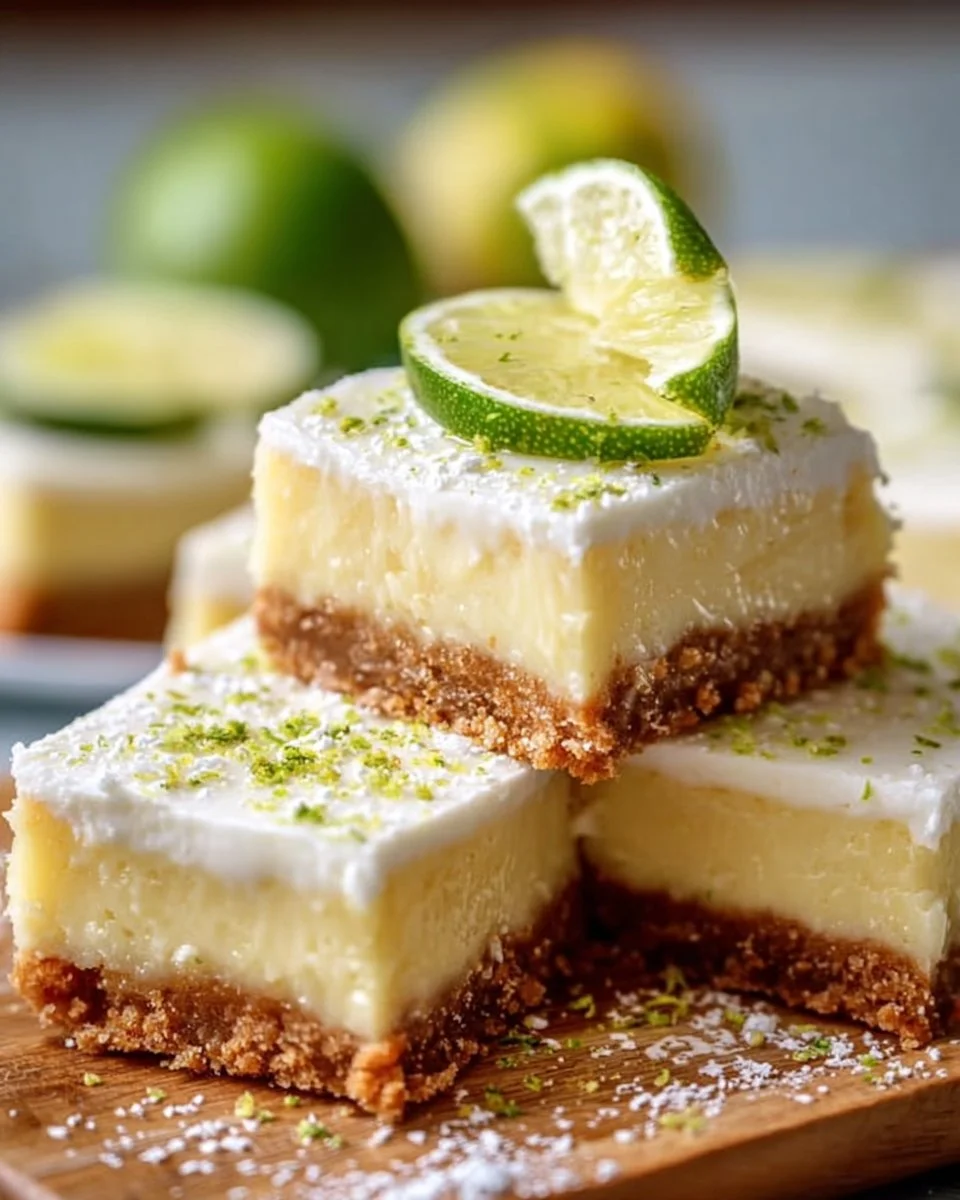
The tantalizing aroma of tart lime mingles with the buttery sweetness of graham crackers, beckoning you to savor a slice of paradise. Picture this: a golden crust, perfectly crisp yet delicately tender, giving way to a luscious filling that dances on your palate with a symphony of flavor. Each bite bursts with bright, zesty notes and a silken texture that lingers on your tongue, offering a refreshing escape from the everyday. These Key Lime Pie Bars don’t just promise a treat; they gift a delightful experience, evoking memories of sun-drenched beaches and the joyful warmth of summer.
As you step into your kitchen to create these bars, let the anticipation build. You’re not just about to prepare dessert; you’re about to craft a slice of happiness. Each ingredient plays its role beautifully, weaving together a story that unfolds in every decadent bite. Not only will your taste buds rejoice, but the vibrant colors and inviting appearance will make these bars the star of any gathering. These treats will be the highlight, the conversation starter, and the reason for stealing a moment of bliss.
Why You’ll Love This Key Lime Pie Bars
These Key Lime Pie Bars encapsulate the essence of summertime indulgence. The balance between the sweetness of the condensed milk and the bright acidity of fresh key lime juice creates a flavor playground that dances harmoniously across your tongue. The bars are not overly sweet, allowing the key lime’s natural tartness to shine—this is dessert perfection for any palate. They offer a refreshing twist to traditional pies, cut into neat squares that make each piece easy to grab and enjoy, whether at a picnic, family gathering, or an evening to yourself.
The simplicity of this recipe makes it irresistible. With minimal effort, you transform pantry staples into a show-stopping dessert. They serve beautifully chilled, providing the perfect cooling relief on a warm day. Plus, the adjustable nature of this recipe invites creativity: add berries for a pop of color or a dollop of whipped cream for an extra layer of decadence. You’ll find that these bars become your go-to for any occasion, celebrating simple moments and elevating gatherings into memorable experiences.
Preparation Phase & Tools to Use
Before diving into the delicious process, gather your essential tools, each serving a purpose in crafting these scrumptious bars:
- Mixing Bowls: Two bowls allow you to create the crust and filling separately, ensuring a smooth and efficient preparation process.
- Whisk or Electric Mixer: You’ll need this for perfectly combining the filling ingredients into a smooth, creamy texture.
- 8×8 inch Baking Dish: The ideal size for these bars, ensuring uniform cooking without overbaking.
- Spatula: Use this handy tool to spread the filling evenly over your crust.
Preparation Tips:
- Make sure your butter is fully melted but not boiling; this helps your crust hold together without being greasy.
- Use a measuring cup to pack your graham cracker crumbs tightly for a sturdy crust.
- Allow the bars to cool completely at room temperature before refrigerating to ensure a clean cut later.
Ingredients for Key Lime Pie Bars
- 1 and ½ cups graham cracker crumbs: The base of your bars, offering that signature crunch, can be substituted with digestive biscuits if unavailable.
- ½ cup unsalted butter, melted: This binds the crumbs together. Use coconut oil or a vegan alternative for a dairy-free version.
- ¼ cup sugar: Granulated sugar adds sweetness to the crust. You can also use a sugar substitute if you’re monitoring your sugar intake.
- 2 cans (14 ounces each) sweetened condensed milk: The foundation of your creamy filling. Sweetened coconut milk works as a vegan substitute.
- ¾ cup key lime juice: The star of the show! Freshly squeezed juice offers the most vibrant flavor, but bottled juice can work in a pinch.
- 4 large egg yolks: These enrich the filling and give it a silky texture. For an egg-free alternative, consider silken tofu blended until smooth.
- Zest of 1 lime: Zest elevates the lime flavor. Feel free to add zest from a lemon or orange for an interesting twist.
How to Make Key Lime Pie Bars
-
Preheat your oven to 350°F (175°C). The warmth will help your bars set perfectly.
-
In a mixing bowl, combine graham cracker crumbs, melted butter, and sugar until the mixture resembles wet sand. When pressed together, it should hold its shape.
-
Press the crust mixture firmly into the bottom of your 8×8 inch baking dish. Use the bottom of a measuring cup to ensure it’s compact and even.
-
In another bowl, whisk together the sweetened condensed milk, key lime juice, egg yolks, and lime zest until smooth. The mixture should shimmer and feel creamy.
-
Pour the filling over the crust and spread it evenly with a spatula. This will ensure each bar bakes uniformly.
-
Bake for 15-20 minutes until the filling is just set but slightly wobbly in the center. The edges may look a little firmer, and that’s perfect.
-
Allow the bars to cool at room temperature for about an hour, then refrigerate for at least 2 hours. This chilling step is crucial for achieving the right texture.
-
Once chilled, cut into squares and serve. Top with whipped cream or fresh berries if desired, adding a refreshing contrast to the tangy filling.
Chef’s Notes & Helpful Tips
-
Make-ahead Tips: These bars last well in the fridge for up to a week, making them perfect for prepping ahead for parties or gatherings.
-
Cooking Alternatives: If you’re short on time, use an air fryer set to 325°F for the crust, ensuring you check frequently to avoid overbaking.
-
Customization Ideas: Add a swirl of raspberry puree on top for a beautiful contrast, or incorporate coconut for a tropical twist.
Common Mistakes to Avoid
Creating the perfect Key Lime Pie Bars can seem daunting, but avoiding a few common mistakes makes all the difference:
-
Overbaking the filling: This leads to a rubbery texture. Monitor closely; it’s ideal when the center has the slightest jiggle.
-
Skipping the cooling step: Allowing the bars to cool fully ensures they slice easily without crumbling, so be patient.
-
Not zesting enough: The zest enhances the flavor, so take the time to add it generously; it’s a small detail that elevates the dish.
What to Serve With Key Lime Pie Bars
Pair your delightful Key Lime Pie Bars with complementary flavors and textures for a well-rounded dessert spread:
- Fresh whipped cream: The creamy sweetness offsets the tartness beautifully.
- Berries: Strawberries, raspberries, or blueberries add a pop of color and freshness.
- Mint leaves: A fragrant garnish adds a burst of freshness with each bite.
- Coconut sorbet: Serve alongside for an extra layer of refreshing flavor.
- Iced tea or lemonade: Their lightness complements the bars and balances the tanginess nicely.
- Chocolate drizzle: For those who love contrast, a bit of dark chocolate could create an exquisite flavor combination.
Storage & Reheating Instructions
Store your Key Lime Pie Bars in the fridge, tightly covered, for up to one week. If you want to save some for later, freeze them for up to three months. Wrap them well in plastic wrap and then in foil for the best protection against freezer burn. When you’re ready to enjoy, simply transfer them to the fridge to thaw overnight. They can be enjoyed chilled straight from the fridge; no need for reheating!
Estimated Nutrition Information
Each square contains approximately:
- Calories: 200
- Total Fat: 10g
- Saturated Fat: 6g
- Carbohydrates: 28g
- Dietary Fiber: 1g
- Sugars: 18g
- Protein: 3g
These values are approximate and can vary based on ingredient brands and specific measurements used.
FAQs
1. Can I use regular limes instead of key limes?
Absolutely! Regular limes will work beautifully and provide a similar tangy flavor. The taste may be slightly different, but hardly noticeable.
2. What can I use instead of sweetened condensed milk?
You can substitute with full-fat coconut milk for a dairy-free alternative. However, you may want to adjust the sugar slightly, as coconut milk can have a different sweetness level.
3. How do I store leftover bars?
Store them in an airtight container in the fridge for up to a week or in the freezer for up to three months, tightly wrapped to maintain freshness.
4. Can I make the crust without graham crackers?
Certainly! Crushed cookies like Oreos or even gluten-free alternatives can work wonderfully. Just ensure you balance the sweetness accordingly.
5. Is it possible to make this recipe vegan?
Yes! Substitute eggs with flax eggs (one tablespoon of ground flaxseed mixed with three tablespoons of water equals one egg) and use coconut milk for the filling. Opt for a vegan butter alternative for the crust as well.
As the last crumbs of Key Lime Pie Bars disappear, cherish the moments that led to the creation of this heavenly dessert. Each bite, bright and refreshing, leaves you longing for more—a true testament to the joys of home-baking. Celebrate the simple pleasures of life with your homemade bars, sharing them with loved ones or savoring them as a well-deserved indulgence solo. Discover how a delightful fusion of flavors can uplift your spirits, and dive into this delightfully bright treat that invites sunshine into every bite. Don’t just read about the magic—create it in your kitchen today!
Print
Key Lime Pie Bars
- Prep Time: 20 minutes
- Cook Time: 20 minutes
- Total Time: 2 hours 40 minutes
- Yield: 16 servings 1x
- Category: Dessert
- Method: Baking
- Cuisine: American
- Diet: Vegetarian
Description
Deliciously refreshing Key Lime Pie Bars with a buttery graham cracker crust and zesty lime filling, perfect for summer gatherings.
Ingredients
- 1 and ½ cups graham cracker crumbs
- ½ cup unsalted butter, melted
- ¼ cup sugar
- 2 cans (14 ounces each) sweetened condensed milk
- ¾ cup key lime juice
- 4 large egg yolks
- Zest of 1 lime
Instructions
- Preheat your oven to 350°F (175°C).
- Combine graham cracker crumbs, melted butter, and sugar until the mixture resembles wet sand.
- Press the crust mixture firmly into the bottom of your 8×8 inch baking dish.
- Whisk together the sweetened condensed milk, key lime juice, egg yolks, and lime zest until smooth.
- Pour the filling over the crust and spread it evenly with a spatula.
- Bake for 15-20 minutes until the filling is just set but slightly wobbly in the center.
- Allow the bars to cool at room temperature for about an hour, then refrigerate for at least 2 hours.
- Once chilled, cut into squares and serve.
Notes
Serve with whipped cream or fresh berries for an extra treat. Store in the fridge for up to a week or freeze for up to three months.
Nutrition
- Serving Size: 1 serving
- Calories: 200
- Sugar: 18g
- Sodium: 150mg
- Fat: 10g
- Saturated Fat: 6g
- Unsaturated Fat: 3g
- Trans Fat: 0g
- Carbohydrates: 28g
- Fiber: 1g
- Protein: 3g
- Cholesterol: 120mg