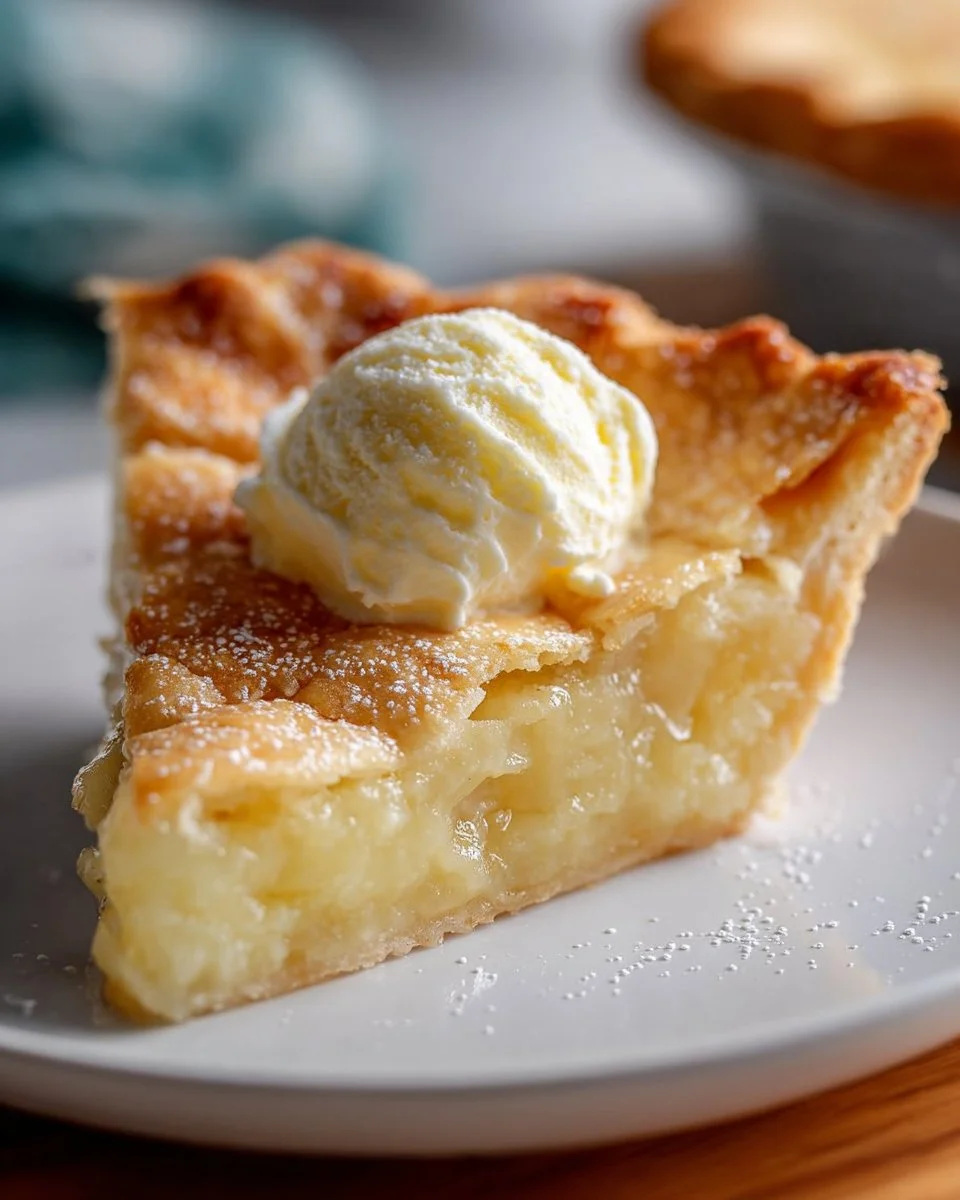
The moment you step into a warm kitchen, the air thickens with promise and nostalgia. You can almost hear the gentle whispers of family recipes, secrets passed down through generations. Among them, the all-butter pie crust stands as a golden treasure, a canvas for sweet and savory masterpieces alike. Imagine rolling out gleaming dough, its surface soft yet sturdy, as your senses come alive with the scent of fresh butter mingling with flour. Each fold and turn beckons you closer to the sensation of indulging in a buttery slice of a freshly baked pie, its golden crust enveloping delicious fillings that tell their own stories.
When you finally pull a pie from the oven, golden and flaky, anticipation fills the room. The first slice reveals a crisp, delicate crust that promises a perfect balance of crunch and tenderness. You can practically taste the love infused into each layer. From the first bite, as flavors dance together, your heart warms at the thought of sharing such a delightful treat with loved ones. Prepare to embark on a culinary adventure that transforms simple ingredients into a remarkably satisfying experience.
Why You’ll Love This All Butter Pie Crust
Crafting an all-butter pie crust means embracing a blend of simplicity and indulgence. This crust strikes a perfect balance, boasting a rich, buttery flavor with a texture that snaps with every bite. It beautifully cradles your favorite fillings, from a classic apple pie to a decadent chocolate tart, allowing the essence of the filling to shine through.
This crust isn’t just another recipe; it’s a heartfelt creation made for birthdays, holidays, and cozy get-togethers. Each slice becomes an occasion, a reason to pause and savor the moment. Imagine the delight on your family’s faces as they gather around the table, forks in hand, eager to dig into a pie that embodies everything comforting about home.
Preparation Phase & Tools to Use
Before striving for pie perfection, gather your essential tools. Each one plays a crucial role in shaping your pie crust.
-
Food Processor: This trusty kitchen companion streamlines the mixing process, ensuring the butter gets perfectly integrated without warming it too much. A food processor makes quick work of combining dry ingredients and cutting in butter—an essential step for achieving that flaky texture.
-
Rolling Pin: A classic rolling pin rolls out your dough evenly, ensuring a consistent thickness throughout. Look for a sturdy one that feels comfortable in your hands.
-
Parchment Paper: Flouring your surfaces can be messy. Parchment paper lets you roll without extra flour, keeping your dough clean and easy to handle.
-
Plastic Wrap: You’ll need this to wrap your dough discs before chilling. It helps retain moisture and prevents sticking, yielding a well-rested dough.
Preparation Tips: Always use chilled ingredients to keep the butter cold, which creates those beautiful flaky layers. Working quickly will help maintain the dough’s integrity.
Ingredients for All Butter Pie Crust
To achieve a perfect pie crust, gather the following:
-
2 ½ cups all-purpose flour: This is the foundation, providing structural integrity while capturing and holding the fat.
-
1 teaspoon salt: A touch of salt enhances the flavor and balances the sweetness of fillings.
-
1 tablespoon sugar (optional): If you opt for a slightly sweet crust for desserts, this sugar elevates the taste beautifully.
-
1 cup unsalted butter, chilled and cut into cubes: Cold butter creates that flaky texture that makes every bite irresistible. Unsalted butter allows you to control the saltiness.
-
6-8 tablespoons ice water: Ice water helps bring the dough together without melting the butter, an essential step in maintaining flakiness.
Feel free to experiment with alternatives like whole wheat flour for a nuttier flavor or a gluten-free blend for dietary needs.
How to Make All Butter Pie Crust
-
In a food processor, combine the flour, salt, and sugar (if using). Pulse a few times to mix everything uniformly, ensuring the salt and sugar are evenly distributed.
-
Next, add the chilled butter cubes to the flour mixture. Pulse until the mixture resembles coarse crumbs, with pea-sized bits of butter remaining. This step is vital for achieving that sought-after flaky texture.
-
Gradually add ice water, one tablespoon at a time. Pulse after each addition until the dough just comes together. It should hold its shape without being sticky or overmixed.
-
Turn the dough out onto a lightly floured surface and divide it into two discs. Handle the dough gently, as overworking it can lead to a tougher crust. Wrap each disc in plastic wrap and refrigerate for at least 1 hour to allow the gluten to relax.
-
When ready to roll out, take one disc from the fridge. On a lightly floured surface, roll it out gently until it fits your desired pie dish. Aim for an even thickness to ensure consistent baking. Gently press the dough into the dish, trimming the edges as needed and reserving scraps for decorative glaze if desired.
Chef’s Notes & Helpful Tips
-
Make-ahead Tips: Prepare the dough a day in advance. It keeps well in the refrigerator for up to three days or can be frozen for up to three months. Just ensure to label and date your wrapped discs!
-
Cooking Alternatives: This all-butter crust shines beautifully when baked in both conventional ovens and air fryers. Adjust the temperature slightly if using an air fryer to avoid over-baking.
-
Customization Ideas: Consider adding spices like cinnamon or nutmeg for a warm touch. You can also incorporate a handful of finely chopped herbs for savory pies, adding a unique twist to your creations.
Common Mistakes to Avoid
Crafting the perfect pie crust requires attention to detail. To ensure success, avoid these common pitfalls:
-
Using Warm Butter: If your butter warms up too much, you risk losing the flaky texture. Always keep it chilled until ready to use.
-
Overmixing the Dough: This can lead to a tough crust, stripping it of the desired tenderness. Blend just until combined and no dry flour remains.
-
Skipping the Chill Time: Don’t rush the refrigeration step. Chilling the dough allows gluten to relax, resulting in a tender crust.
What to Serve With All Butter Pie Crust
The versatility of this all-butter pie crust means it pairs beautifully with a variety of fillings:
-
Classic Apple Pie: Spice-infused tart apples juxtapose wonderfully against a buttery crust.
-
Creamy Pumpkin Pie: The warmth of pumpkin spice enveloped in flaky goodness is a seasonal delight.
-
Lemon Meringue Pie: The tanginess balances out the sweetness of the butter crust in an exhilarating way.
-
Chocolate Silk Pie: Rich and indulgent, this pie balances the buttery notes with a luxurious, creamy filling.
-
Quiche Lorraine: Transform this crust into a savory dish, filled with eggs, cheese, and crispy bacon.
-
Cherry Tart: Juicy, tart cherries nestled within a buttery embrace awaken delightful memories of summer.
-
Savory Meat Pies: Marvel at how the crisp crust enhances various fillings from meats to vegetables.
-
Pecan Pie: The nutty sweetness melds beautifully with that buttery base, creating an irresistible dessert.
Storage & Reheating Instructions
To keep your pie crust crisp and delicious, store it properly:
-
Fridge: Cover your pie with plastic wrap or a lid if it’s in a container. It can last for up to 3 days.
-
Freezer: Wrap it tightly in plastic wrap and aluminum foil. It retains quality for up to 3 months. Thaw it overnight in the refrigerator before use.
-
Reheating: For reheating baked pies, place them in a preheated oven at 350°F for about 10-15 minutes until warmed through and the crust regains its crispness.
Estimated Nutrition Information
While precise values can vary based on specific ingredients used, here’s an approximate breakdown for a single slice of pie using this crust:
- Calories: 200
- Total Fat: 12g
- Saturated Fat: 7g
- Carbohydrates: 22g
- Fiber: <1g
- Sugar: 1g
- Protein: 2g
Please note that these values are estimates and vary based on fillings and specific brands of ingredients used.
FAQs
Q1: Can I use salted butter instead of unsalted?
A1: Yes, you can! However, since salted butter varies in saltiness, consider reducing or omitting added salt in the recipe to control the overall flavor.
Q2: What can I do if my dough is too crumbly?
A2: If your dough seems crumbly and won’t hold together, gradually add more ice water, a tablespoon at a time. Pulse gently until the dough just comes together.
Q3: How do I know when my crust is fully baked?
A3: Look for a golden-brown color on the crust edges, and you can also gently press the surface—it should feel firm to the touch.
Q4: Can I double the recipe?
A4: Absolutely! Simply double the ingredients and follow the same method. This is perfect for baking multiple pies in a single go.
Q5: What’s the best way to roll out my dough?
A5: Lightly flour your work surface and rolling pin to prevent sticking. Roll out from the center outward, applying even pressure to achieve a consistent thickness.
Embrace the spirit of homemade goodness with this all-butter pie crust recipe that beckons you to gather your family and friends. Let every flaky bite be a reminder of cherished moments spent in the kitchen, creating delicious memories. So, roll up your sleeves, make this pie crust, and prepare to impress with every flavorful filling you choose. You’re not just baking; you’re spreading happiness with a flurry of butter, flour, and love!
Print
All Butter Pie Crust
- Prep Time: 15 minutes
- Cook Time: 20 minutes
- Total Time: 35 minutes
- Yield: 2 pie crusts 1x
- Category: Dessert
- Method: Baking
- Cuisine: American
- Diet: Vegetarian
Description
A rich and flaky all-butter pie crust perfect for any sweet or savory filling.
Ingredients
- 2 ½ cups all-purpose flour
- 1 teaspoon salt
- 1 tablespoon sugar (optional)
- 1 cup unsalted butter, chilled and cut into cubes
- 6–8 tablespoons ice water
Instructions
- Combine the flour, salt, and sugar (if using) in a food processor.
- Add the chilled butter cubes to the flour mixture and pulse until it resembles coarse crumbs.
- Gradually add ice water, one tablespoon at a time, pulsing until the dough just comes together.
- Turn the dough out onto a lightly floured surface and divide it into two discs.
- Wrap each disc in plastic wrap and refrigerate for at least 1 hour.
- Roll out one disc on a lightly floured surface until it fits your desired pie dish.
- Press the dough into the pie dish, trimming the edges as needed.
Notes
For best results, use chilled ingredients and do not overmix the dough.
Nutrition
- Serving Size: 1 slice
- Calories: 200
- Sugar: 1g
- Sodium: 400mg
- Fat: 12g
- Saturated Fat: 7g
- Unsaturated Fat: 3g
- Trans Fat: 0g
- Carbohydrates: 22g
- Fiber: <1g
- Protein: 2g
- Cholesterol: 30mg